There’s something undeniably enchanting about a perfectly crafted hand pie. More than just a dessert, it’s a tiny, portable parcel of joy, offering all the comforting flavors of a traditional pie without the need for plates or forks. Among these delightful treats, the strawberry hand pies recipe stands out as a true star, especially when those sweet, juicy berries are in season. But what truly elevates a good hand pie to an extraordinary one? The secret lies in a harmonious blend of a decadently flaky, buttery crust and a vibrantly flavored strawberry filling, intensified by the unexpected magic of vanilla.
Forget messy slices and elaborate presentations. Hand pies are designed for convenience, making them perfect for picnics, lunchboxes, or simply a sweet grab-and-go snack that even the kiddos can enjoy without missing a beat in their play. They’re also incredibly versatile, lending themselves beautifully to freezing for a quick treat whenever the craving strikes. This comprehensive guide will unveil the crucial techniques and ingredients that make all the difference, transforming fresh strawberries and simple dough into an unforgettable culinary experience.
The Magic of Flaky Crust: Butter's Secret to Perfection
The foundation of any exceptional strawberry hand pies recipe is undoubtedly its crust. A truly flaky, tender, and buttery crust is not just a vessel for the filling; it's an integral part of the flavor and texture profile. The secret to achieving this coveted flakiness lies almost entirely in one humble ingredient: cold unsalted butter.
- Cold is Key: The colder your butter, the better. When tiny pieces of cold butter are encased in the dough and hit the heat of the oven, they create steam. This steam pushes apart the layers of dough, resulting in those desirable flaky pockets. If your butter is too warm, it melts into the flour, leading to a tough, bready crust instead of a flaky one.
- Unsalted for Control: Using unsalted butter allows you complete control over the salt content in your dough. Different brands of salted butter have varying amounts of sodium, so starting with unsalted ensures a consistent flavor profile. Don't forget to add a pinch of fine sea salt to your flour mixture; it enhances the overall flavor of the crust.
- Ice Cold Water: Just like the butter, the water you add to your dough must be ice-cold. This helps to keep the butter solid and prevents the dough from becoming too warm while you're mixing it. Start with half the recommended water and gradually add more, just until the dough comes together. Over-hydrating or overworking the dough can lead to a tough crust.
- The Resting Period: Once your dough is mixed, gently form it into a disk, wrap it tightly, and chill it for at least 30 minutes, or preferably an hour or two. This resting period allows the gluten to relax, making the dough easier to roll out, and gives the flour time to fully absorb the moisture, resulting in a more pliable and less sticky dough.
While making pie dough from scratch is incredibly rewarding, don't shy away from using high-quality refrigerated pie dough for convenience. It's a fantastic shortcut that still allows you to focus on the star of the show: the filling.
Unlocking Strawberry Bliss: The Vanilla & Roasting Advantage
The filling is where your strawberry hand pies recipe truly shines. While a simple stovetop cook of strawberries, sugar, and cornstarch works perfectly well (as seen in many classic recipes like Katie Lee Biegel’s), there's a more profound, intensely flavorful path you can take: roasting.
Roasting strawberries, rather than just simmering them, caramelizes their natural sugars and concentrates their essence, transforming them into a rich, jammy confection. This method brings out a depth of flavor that stovetop cooking often misses. It's an easy twist that yields a more robust and sweet-tart experience, making it a cornerstone for those who truly want to Unlock Intense Flavor: Roasted Strawberry Hand Pies Recipe.
Here's how to elevate your strawberry filling:
- Choose Your Berries Wisely: Whenever possible, opt for fresh, in-season local strawberries. Their natural sweetness and vibrant flavor will be unmatched. While frozen strawberries can be used, be prepared for a slightly longer roasting time due to their higher water content. Thaw them first and drain any excess liquid to avoid a watery filling.
- The Power of Vanilla: This is our secret weapon. When strawberries are roasted with a touch of vanilla (either from a split vanilla bean or a teaspoon of quality vanilla extract), something magical happens. The vanilla doesn't just add its own aroma; it mysteriously enhances and deepens the strawberry flavor, making the berries taste sweeter and more complex. It's a simple addition that makes a world of difference.
- Sugar and Lemon Zest: Granulated sugar helps with the caramelization during roasting and contributes to the jammy texture. You can adjust the amount based on the sweetness of your berries and your personal preference, but a minimum of ½ cup is recommended for proper texture. A teaspoon of fresh lemon zest, added after cooling, provides a bright counterpoint, cutting through the sweetness and adding a lovely aromatic finish.
- Thickening with Cornstarch: Even with roasting, a little cornstarch is crucial to ensure your filling sets properly and doesn't make your hand pies soggy. It helps bind the juices into a luscious, spoonable consistency.
- Cool Completely: This step cannot be overstated. Your filling *must* be completely cooled before spooning it onto the pie dough. Warm filling will melt the butter in your dough, leading to a greasy, tough crust. Plan ahead and allow ample time for cooling, or even make the filling a day in advance.
Crafting Your Hand Pies: A Step-by-Step Guide to Perfection
Once your flaky dough is chilled and your intensely flavored strawberry filling is cooled, it's time to bring these delicious components together to create your perfect Easy Homemade Strawberry Hand Pies: Portable Treats for Kids.
- Preheat and Prep: Preheat your oven to 375°F (190°C). Line a baking sheet with parchment paper to prevent sticking and make cleanup a breeze.
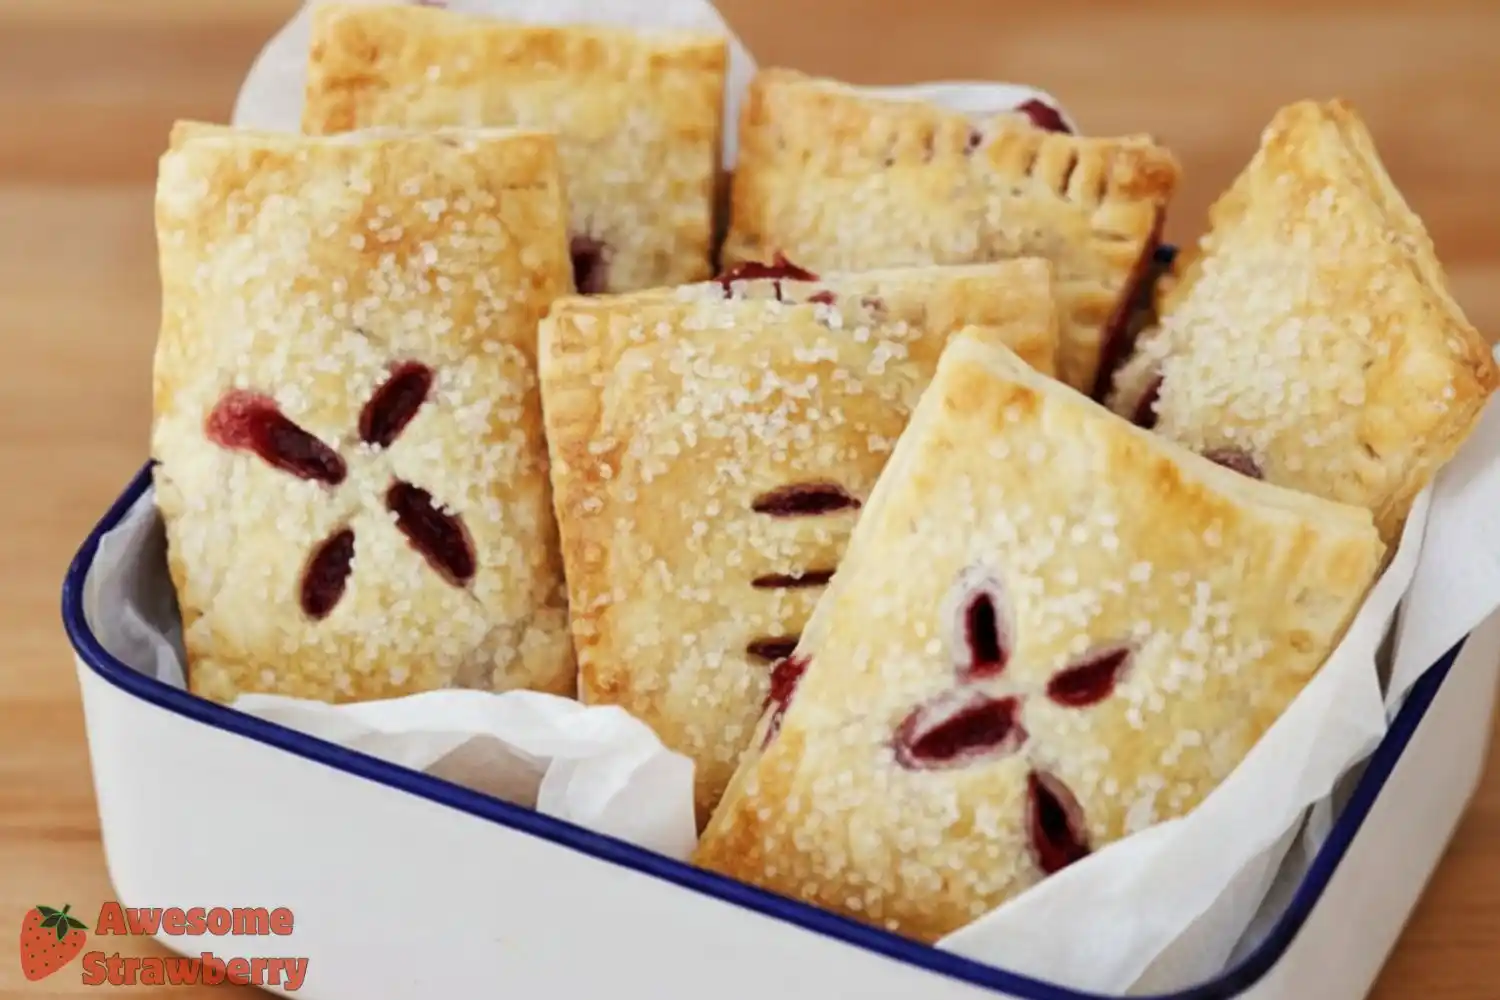
- Roll and Cut the Dough: On a lightly floured surface, gently roll out your chilled pie dough circles. While circles are traditional, squares are often easier for hand pies, minimizing waste. Trim the edges to form large squares, then cut each large square into four smaller, equal-sized squares (typically around 4-5 inches each).
- Assemble the Pies: Place half of your dough squares onto the prepared baking sheet. Spoon about 1-2 tablespoons of the cooled strawberry filling into the center of each square, making sure to leave a generous border (at least ½ inch) around the edges. This border is crucial for sealing.
- Seal with Care: In a small bowl, lightly beat one large egg with a tablespoon of milk to create an egg wash. Brush the edges of the dough squares with the filling. Top each filled square with another dough square. Use the tines of a fork to firmly press and seal the edges, creating a decorative and secure border that locks in the delicious filling.
- Vent and Garnish: Use the fork or a small knife to create a few vents in the center of each hand pie. These vents allow steam to escape during baking, preventing your pies from bursting. Brush the tops of the assembled hand pies with the remaining egg wash, and then sprinkle generously with turbinado sugar for a beautiful sparkle and a delightful crunch.
- Bake to Golden Perfection: Bake in the preheated oven for about 25-30 minutes, rotating the baking sheet once halfway through, until the crust is beautifully golden brown and the filling is bubbly.
- Cool and Enjoy: Transfer the baked hand pies to a wire rack to cool completely. While it's tempting to dig in immediately, allowing them to cool prevents the filling from spilling and ensures the crust maintains its integrity.
Tips for Success & Delicious Variations
Mastering the strawberry hand pies recipe is just the beginning. Here are some extra tips and ideas to make your baking experience even better:
- Freezing for Future Feasts: Hand pies are fantastic for meal prep!
- Unbaked: Assemble the pies up to the point of baking, but don't bake them. Place them on a parchment-lined baking sheet and freeze until solid. Once frozen, transfer them to a freezer-safe bag or container. When ready to bake, place frozen pies on a baking sheet, brush with egg wash, sprinkle with sugar, and bake from frozen, adding an extra 10-15 minutes to the baking time.
- Baked: Once baked and completely cooled, freeze hand pies in a single layer until solid, then transfer to an airtight container. Reheat in a 350°F (175°C) oven for 10-15 minutes until warmed through.
- Experiment with Flavors: While strawberries and vanilla are a classic pairing, don't hesitate to play with other flavor enhancers. A tiny pinch of ground cardamom or a whisper of almond extract in the filling can add an intriguing layer of complexity.
- Seasonal Swaps: This hand pie technique isn't just for strawberries! As seasons change, swap out the filling for other fruits. Think apple cinnamon, blueberry lemon, cherry almond, or even a savory option like spinach and feta.
- Preventing Soggy Bottoms: Beyond cooling your filling, consider brushing the bottom crust with a thin layer of melted butter or a sprinkle of breadcrumbs before adding the filling. This creates a barrier that can help prevent the crust from absorbing too much moisture.
There you have it – the secrets to creating incredible strawberry hand pies recipe that boast a shatteringly flaky crust and a deeply flavorful strawberry-vanilla filling. These portable treats are more than just a dessert; they're an experience, perfect for sharing, gifting, or savoring all to yourself. By understanding the critical role of cold butter, the flavor-intensifying magic of roasted strawberries, and the subtle boost of vanilla, you're now equipped to bake hand pies that will impress and delight every time. So grab your apron, gather your ingredients, and get ready to create a batch of these irresistible handheld delights.
